I've recently fallen in love with Git DMZ Flow - a Git workflow that utilizes forking instead of branching to manage code workstreams. I've found documentation on actually using Git DMZ Flow to be lacking, so I'm hoping to fix that with this article.
I originally wrote on this topic on the Perficient Sitecore blog. That article is a longer version of this with a little more theory and explanation. This version gets right to the point: code samples.
Understanding Git DMZ Flow
I recommend starting with a thorough read of Git DMZ Flow. This covers the core concepts very well, but doesn't detail the actual day-to-day usage that most developers will be familiar with.
Developers will generally follow this workflow between the upstream repo and their local fork:
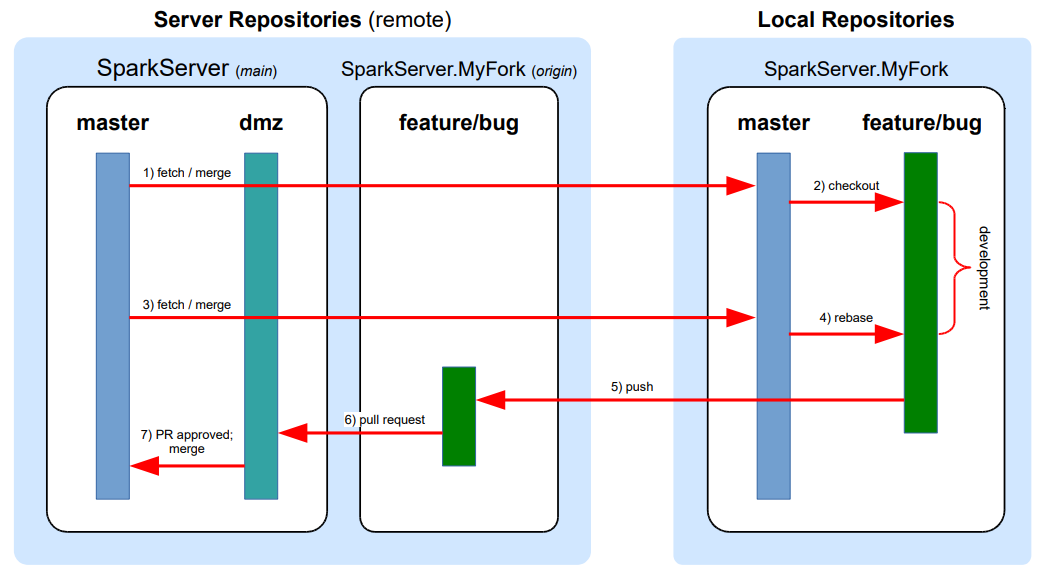
Using Git DMZ Flow
Here's an example of the steps a developer would follow to get started, develop, and create pull requests using Git DMZ Flow.
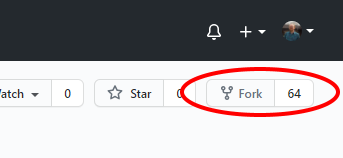
Step 1: Create Fork and Clone Repo
Create a fork of the upstream repository on your platform of choice. In this case, I'm using GitHub:
Next, clone your newly-forked remote repository to your local machine:
$ git clone https://github.com/bmbruno/SparkServer.MyFork.git
This is a one-time operation.
Step 2: Set Up Remote Repos
Each developer should ensure they have remotes set up for their fork and the upstream repo. To do this, add the upstream as a remote:
(master)
$ git remote add upstream https://github.com/bmbruno/SparkServer.git
This should be repeated for every fork you want to access. For example, add another developer's fork to review his pull requests:
(master)
$ git remote add johnny https://github.com/bmbruno/SparkServer.johnny.fork.git
Verify that you have the correct remotes set up:
(master)
$ git remote -v
Output:
origin     https://github.com/bmbruno/SparkServer.MyFork.git (fetch)
origin     https://github.com/bmbruno/SparkServer.MyFork.git (push)
upstream   https://github.com/bmbruno/SparkServer.git (fetch)
upstream   https://github.com/bmbruno/SparkServer.git (push)
johnny     https://github.com/bmbruno/SparkServer.johnny.fork.git
johnny     https://github.com/bmbruno/SparkServer.johnny.fork.git
Step 3: Keep Your master Branch In Sync
It is recommended that developers keep their fork's master branch in sync with the upstream master branch at a couple of regular intervals:
- before creating any branches
- before creating a PR
In either case, always fast-forward your sync to ensure a new merge commit isn't created and the history remains clean.
To fetch and merge into your master branch:
(master)
$ git fetch upstream
$ git merge upstream/master --ff-only
Step 4: Branch and Develop
Now you're ready to begin work on a feature or bug. Developers should create branches based on their updated master branch:
(master)
$ git checkout -b feature/my-work-branch
Step 5: Create a Pull Request
Merge conflicts should be fixed in the developer's fork before creating a PR.
Pull the latest master from upstream into the forked master branch:
(master)
$ git fetch upstream
$ git merge upstream/master --ff-only
You can consolidate the above commands into one step using pull:
(master)
$ git pull upstream master --ff-only
To keep your branch's history clean, developers should rebase master onto the feature branch:
(feature/my-work-branch)
$ git rebase master
Fix any merge conflicts that arise.
Finally, push your feature branch to your 'origin' remote to make it available on the server.
(feature/my-work-branch)
$ git push
If you haven't pushed the branch before, you may have to identify the remote:
(feature/my-work-branch)
$ git push --set-upstream origin feature/my-work-branch
That's it! Now you can create a pull request that should target the dmz branch of the upstream repository. With proper automation, the PR will complete after review and dmz will be automatically merged into upstream master.